In brief: reading H4 or H7 on the old bulb is not enough to place a safe order. Check the lighting function, headlamp design, retaining system, room behind the cap, supply voltage and bulb-monitoring system. After installation, the useful result is not a colour claim on the box but a controlled beam with the correct cut-off, helping the driver without dazzling oncoming traffic.
Dusk arrives earlier in the second half of August, while the contrast between a lit street and a dark road section becomes more pronounced. Weak output, cloudy optics or a poorly matched replacement becomes obvious precisely when extra visibility matters.
Why the light may start to feel insufficient
The bulb is not always the cause. Output can be lost through a dirty outer lens, cloudy plastic, a damaged reflector, moisture inside the housing, voltage drop, incorrect aim, or old bulbs that no longer perform equally. A source advertised as brighter cannot restore a burnt reflector or correct the direction of the beam.
Begin with a simple inspection. Do both headlamps work on dipped and main beam? Is the colour similar on both sides? Look for condensation, cracks, deposits and heat damage at the connector. If one side is clearly lower, higher or more diffuse, diagnose the headlamp and its adjustment before buying a different technology.
A clean lens and a sound headlamp matter more than a large number on the packaging. In rain and on unevenly lit roads, uncontrolled scatter can create a bright veil near the car without improving the visibility of lane markings, the verge or hazards.
H4, H7 and other bases: what the code actually means
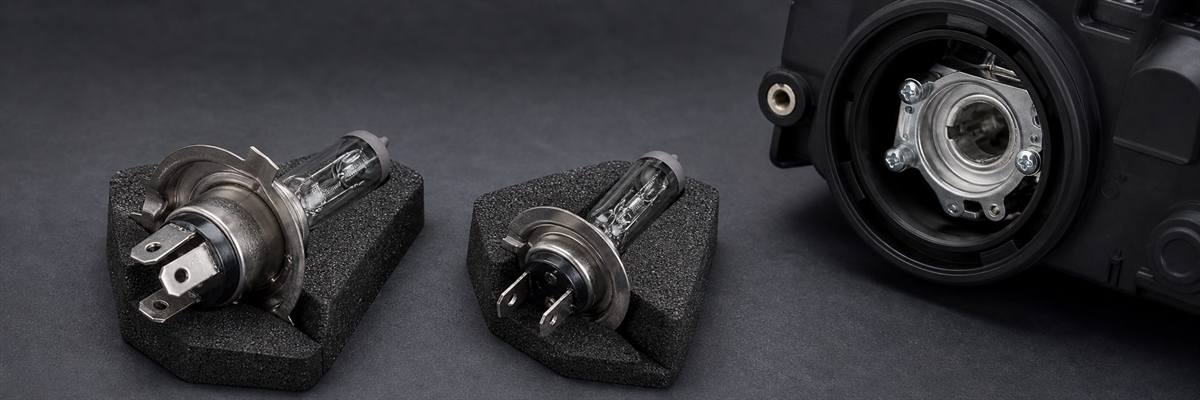
H4 is a dual-filament halogen category with a P43t base. One bulb commonly provides dipped and main beam in the same headlamp. It has three electrical contacts and a distinctive metal flange. H7 is a single-filament category with a PX26d base and two contacts. One bulb performs one function, so dipped and main beam are often assigned to separate bulbs. The vehicle and the headlamp design still determine the exact function.
H1, H3, H8/H9/H11, HB3/HB4 and other codes are not lower or higher versions of H4 and H7. They have different locating geometry, electrical specifications and applications. Do not file a flange, bend a retainer or select a bulb merely because the connector looks similar.
If the car retains its original halogen optics and you need a predictable repair without changing the mounting arrangement, begin with the halogen headlight bulb category. Then filter by the exact base, voltage and rated wattage stated in the vehicle handbook or on the known-correct old bulb.
Halogen or LED: a buyer-focused comparison
| Option | When it makes sense | What to check | Main limitation |
|---|---|---|---|
| Original-type halogen | You need a straightforward replacement without changing the headlamp design | Base, 12/24 V system, rated wattage, connector condition and optics | A new bulb cannot repair a cloudy lens, damaged reflector or poor alignment |
| LED retrofit | The exact kit is confirmed for the specific vehicle and headlamp | Model, year, headlamp number/type, lighting function, emitter orientation, adapter, cap, cooling clearance and electronics | The same H4/H7 label does not guarantee a correct cut-off or permission for road use |
| Headlamp repair first | There is moisture, clouding, reflector damage, connector damage or incorrect aim | Sealing, housing, wiring, voltage and alignment on proper equipment | A more powerful source can hide the fault while increasing glare |
An LED source may offer a different colour and lower electrical load, but the beam depends on the precise position of its emitters relative to the reflector or projector. Treat the LED headlight bulb category as a selection to make after checking the exact application, not as an automatic replacement for every halogen bulb.
Compatibility with the headlamp, cap, adapter and CANBUS system
- Vehicle and headlamp. Match the make, model, generation, year, trim, bulb function and markings on the headlamp housing. The same model year can have more than one headlamp design.
- Mounting and orientation. The bulb must lock into its intended position without play. Some H7 arrangements need a separate holder; choose LED bulb mounting adapters for the specific headlamp, not merely for the word H7.
- Depth and cooling. Measure the space from the bulb seat to the original cap, including the heat sink, fan, driver and safe bend radius of the wiring. Nothing should press against the housing or trap the loom.
- Sealing. Do not leave the headlamp open. If the original cap will not close, use a compatible LED headlamp dust cap of the correct diameter and depth, fitted securely without obstructing cooling.
- On-board electronics. The lower load of an LED can sometimes trigger a bulb warning, flicker or shutdown. A CANBUS label does not promise universal operation. A load resistor or warning canceller for LED bulbs should be chosen only after confirming the actual error and a compatible circuit. Load components can become hot, so they must be wired and mounted according to their instructions, away from heat-sensitive plastic and wiring.
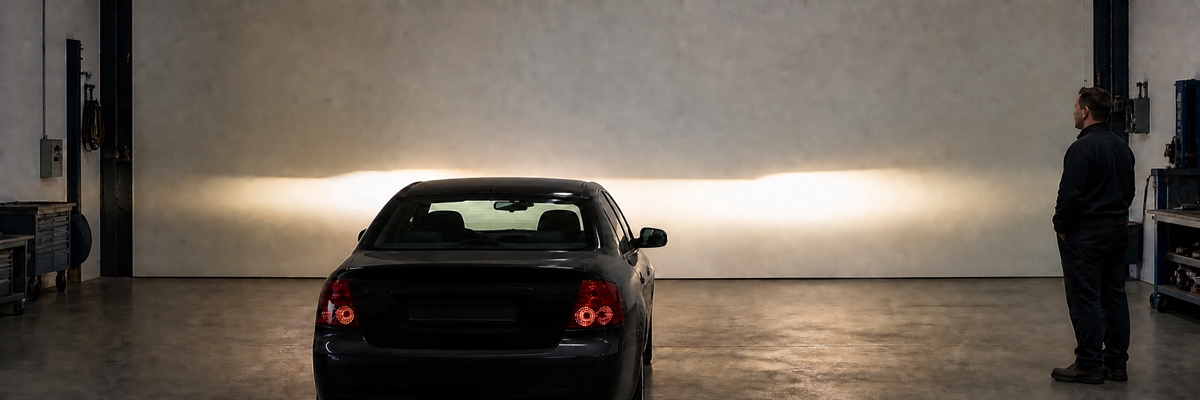
- Beam pattern. Check both headlamps on level ground after installation. The cut-offs should be comparable on both sides with no intense patches above the main line. A wall is useful for a preliminary check; accurate alignment requires suitable equipment.
When choosing LED headlight bulbs, the base alone is insufficient: check the vehicle version and year, lighting function, headlamp approval number, CANBUS accessory, cap and adapter separately. Consult the documentation issued for the exact bulb you intend to use.
What to check before ordering
- Photograph the old bulb marking, connector, retainer and cap before dismantling anything.
- Use the handbook to confirm which bulb provides dipped beam, main beam or both functions.
- Match the vehicle voltage and original rated wattage; never select by base alone.
- For LED, find a vehicle-and-headlamp application rather than relying on a list of plug types.
- Measure usable depth and cap diameter, allowing safe room for the driver and wiring.
- Confirm whether an adapter is included and whether that exact adapter fits your headlamp.
- Do not add a CANBUS module or resistor just in case; identify the cause of a warning first.
- Buy a matching pair of the same type and series unless the vehicle or kit manufacturer states otherwise.
What the Ukrainian traffic rules mean for this choice
When shopping in the automotive lighting category, account for the current Traffic Rules of Ukraine: the type and operating mode of external lighting devices must correspond to the vehicle design, headlamp adjustment must remain correct, and bulbs and lenses must match the lighting-device type. The cautious legal and technical approach is therefore to confirm the exact combination of vehicle, headlamp, bulb and specified accessories, not just H4 or H7. If the specific retrofit has no supporting documentation, a matching base alone is not sufficient evidence for public-road use.
Common replacement mistakes
- Choosing only by H7 or H4. The function, retainer, headlamp version, year and cap clearance were not checked.
- Installing the LED at the wrong angle. The bulb feels secure, but the emitters are rotated, breaking up the beam and creating glare.
- Leaving the rear cap open. Dust and moisture enter, while loosely placed wiring can touch the cooling fan.
- Buying a canceller in advance. An unsuitable resistor adds load and heat but may not address the actual warning.
- Changing one bulb only. The two sides differ in output or colour and the remaining old halogen has similar ageing.
- Skipping alignment. The road appears brighter to the driver, but part of the output is directed above the useful area and towards other road users.
Checklist after installation
- Switch the ignition off before work and do not touch a halogen glass envelope with bare fingers.
- Confirm that both bulbs lock without play, connectors remain sound and the cables are not under tension.
- Close each headlamp with its original or exactly compatible cap and inspect the seal around the full circumference.
- Test dipped and main beam, dashboard warnings, flicker and unexpected shutdown.
- Compare both beams on a level surface and arrange professional alignment after changing technology or disturbing the headlamp.
- After the first drive, inspect the caps, connectors and housing for condensation. Stop using the lamps if there is a smell, excessive heat or a warning until the cause is corrected.
FAQ
Can an H7 LED replace an H7 halogen simply because the base matches?
No. H7 confirms only the basic source category. You must also verify the exact vehicle and headlamp, retainer, cooling and cap clearance, electronic operation and beam pattern. Without those checks, the parts are not proven compatible.
Should headlight bulbs be replaced as a pair?
For two matching headlamps, a pair of the same type and series usually gives a more balanced result, and the remaining old halogen commonly has similar wear. Check the vehicle handbook and kit instructions for any application-specific exception.
Is a warning canceller always required after fitting LED bulbs?
No. Some cars show no warning, others require a specific CANBUS module, and some symptoms come from polarity, a poor contact or an incompatible driver. Diagnose the symptom first; a random load resistor can heat up without solving it.
What if the LED bulb does not fit under the original cap?
Do not drive with an open headlamp or force the heat sink against the wiring. Find a confirmed cap with the correct depth and diameter, or choose a more compact compatible kit. If a sealed installation is impossible, return to the original source type.
How can I tell whether the new lamps will dazzle other drivers?
As a preliminary check, compare both beams on level ground and look for intense spill above the main cut-off. A wall cannot measure the complete distribution or aim, so an LED retrofit or repaired headlamp should be checked and adjusted on suitable equipment.