Short answer: preparing a car for daily home–school–activities trips does not begin with an organiser or an upholstery protector. First confirm that the child restraint matches the child’s current height and mass, is installed in an allowed seating position and is secured exactly as the restraint and vehicle instructions require. Only then add seat protection, closed storage, a device holder and charging, keeping belts, ISOFIX, head restraints, adjustments and the seating space unobstructed.
Secure the child place before adding accessories
In Ukraine, a child shorter than 150 cm may not be carried without an appropriate child restraint system. The current traffic rules require the system to match the child’s mass and height, to be installed and used according to both manufacturers’ instructions, and the child to remain fastened in it. Child restraints are normally installed on seating positions outside the first row; the rules contain a narrow front-seat exception, not a general shortcut for the everyday school run.
A five-minute trip needs the same sequence as a long journey: the adult fastens the child, checks the belt path or the installation indicators, closes the doors and only then moves off. A school bag, spare shoes, bottle or phone should not lie unsecured beside the child or conceal a belt buckle.
Divide the rear row into three clear zones
The child place consists of the restraint, the vehicle belt or ISOFIX and any top tether specified for that installation. Home-made pads, thick capes and organiser straps do not belong in this zone.
Protected surfaces include the front-seat back, the exposed part of the rear bench and, only when both manuals permit it, the area beneath the restraint. Protection is useful only when it does not change the installation or cover a functional part.
Storage and power mean closable pockets for light items, a stable device holder and a cable of sensible length. Keep all three away from belts, anchorage points, feet and door openings. A small, repeatable layout is easier to inspect every morning than one overfilled pocket.
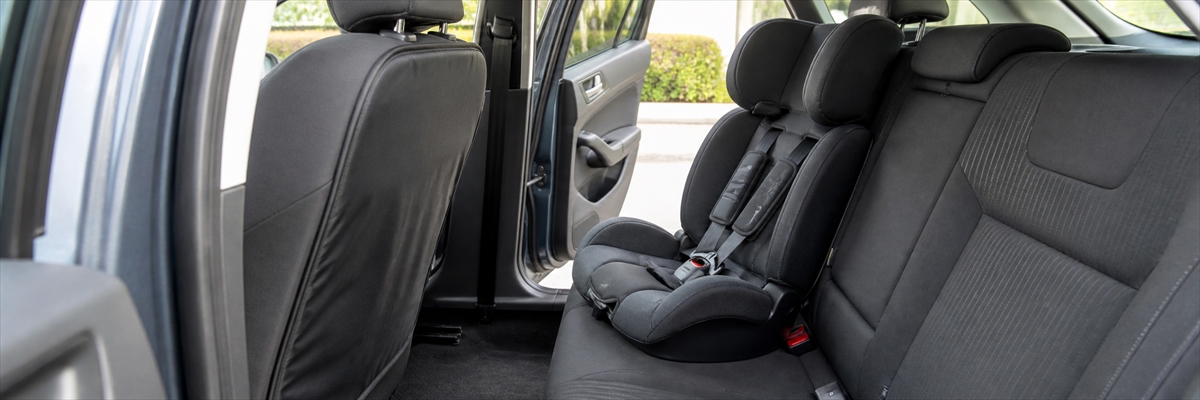
Add accessories around a correctly installed restraint, never beneath it without permission and never across its belts.
Selection table for everyday family routes
| Scenario | Useful setup | Critical check before ordering |
|---|---|---|
| One child with a permanent place | Correctly selected restraint, protector for the front-seat back and a small closed organiser | The restraint matches height and mass; belts, ISOFIX and top tether remain accessible |
| Two children in the rear row | Narrow seat-back organiser or separate pockets for each passenger | Both restraints can be installed correctly and every buckle remains reachable |
| After sport or outdoor activities | Removable washable cape on the unused bench area and a closed shoe pocket | The cape does not run beneath the child restraint or transfer colour to the upholstery |
| A phone is used for navigation | Driver-positioned holder and compatible charger with a suitable cable | Vision and controls remain clear; the route is set before the car moves |
| A rear passenger uses a tablet | Holder rated for the device size and mass | It fits the head restraint, stays clear of the child restraint and locks securely |
Protect seats and seat backs without assuming compatibility
The range of car seat covers, protective mats and capes includes options for shoe marks, crumbs and wet clothing. A thin washable protector for the front-seat back should match the backrest height and attach without pulling the head restraint out of position or contacting wiring and mechanisms. A removable cape can protect the unoccupied part of the rear bench when its backing stays stable, the buckles remain visible and no material enters the child-restraint installation path.
A protector beneath a child restraint is a separate decision. Even a thin product is acceptable only when the instructions for the exact restraint and vehicle allow that kind of added layer. If permission is absent, protecting the upholstery is secondary to maintaining the approved installation. With light fabric, leather or synthetic leather, test the backing in a hidden area for dye transfer, sticking or marks.
Choose an organiser with fewer, better-controlled contents
For the school run, a useful option among car bags, nets and organisers has closable pockets and an understandable mounting scheme. Measure the backrest, the distance between the head-rest posts and the reach of the lower strap. That strap must not wrap around a rail, wire, adjustment mechanism, side-airbag area or the passenger’s feet.
Use the upper pockets for light items such as tissues, a soft pencil case and a small bag. Put a bottle only in a pocket that grips its diameter; secure heavy, sharp or glass items in the boot instead. Do not hang a school bag from a door handle or place it in front of the child place. Use a vehicle-provided storage position, the closed boot or another securing method specified for the car.
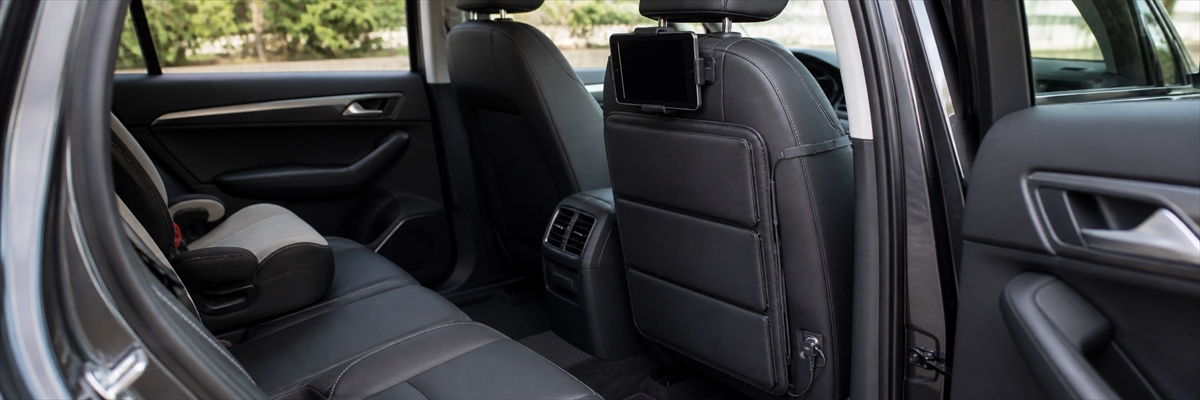
Closed pockets and a short cable route reduce daily clutter when they leave anchorages and foot space untouched.
Set up the device holder and charger before driving
When a phone provides navigation, choose a car phone or tablet holder by mounting location, clamp range, device mass and access to its buttons and port. It must not obstruct the driver’s view, instruments or controls. Set the route, audio and power connection before moving: Ukrainian traffic rules prohibit a driver from using a communication device while holding it in one hand as the vehicle moves.
Before choosing an in-car charger, USB adapter or socket splitter, check the vehicle socket type and voltage, its permitted load, the adapter outputs and the requirements of each device. A large wattage number does not guarantee the required charging mode without a compatible port and cable. Route the cable along a fixed part of the cabin, not across a buckle, ISOFIX, the door opening or the passenger’s feet. A child should not insert or remove the adapter while the car is moving.
Compatibility checks before ordering
- Child and restraint: current height and mass, the exact restraint range, installation direction and approved fixing method.
- Vehicle: permitted seating positions, ISOFIX and top-tether access, belt geometry, buckle location and head-rest requirements in the manual.
- Protection: cushion and backrest dimensions, upholstery material, backing, thickness, fasteners and restrictions for heating or ventilation.
- Organiser: backrest height and width, head-rest posts, lower attachment, pocket closures and the maker’s stated load.
- Holder: mounting surface, support shape or diameter, device dimensions and mass, adjustment range and stability on uneven roads.
- Charger: vehicle socket and voltage, total allowed load, output of each port, the device protocol and suitable cables.
- Functional zones: belts, airbags, rails, wiring, buttons, vents, the driver’s view and passenger foot space all stay clear.
Common rear-row setup mistakes
- Buying a child-seat mat by price or thickness without checking both manuals.
- Feeding a belt or anchorage through a home-made cut in a cape.
- Filling the organiser with bottles, books, tools and other heavy objects.
- Tightening its lower strap around wiring, seat rails or a marked side-airbag area.
- Mounting a holder wherever it fits without checking vision, vibration and the full adjustment range.
- Running a long cable across the child’s legs or leaving a loose connector on the seat.
- Changing every item’s position each day, making a hidden buckle or loose fastener harder to notice in a hurry.
Checklist before the school week
- Compare the child’s current height and mass with the restraint range and review its essential checks.
- Use the vehicle manual to confirm the seating position, belt or ISOFIX, top tether and head-rest position.
- Install the restraint without new accessories; add only permitted protection around it after the installation passes every check.
- Secure the organiser, load only light items and close every pocket.
- Lock the device holder, route the cable and move the front seat through its complete adjustment range.
- Seat and fasten the child according to the restraint instructions; make sure a bag or bulky clothing does not alter the belt path.
- Take an unhurried short test trip, then inspect the mountings, cable and upholstery for movement or marks.
- Once a week remove surplus items and repeat the quick child-place check before the first route.
Factual basis: the current Traffic Rules of Ukraine and Patrol Police guidance on children’s safety in cars. The instructions for your exact restraint and vehicle always take priority for installation. Full links to the official sources are retained in the editorial notes.
Practical FAQ
May I put a protective mat beneath a child restraint?
Only when the exact mat, or that type of added layer, is allowed by both the restraint and vehicle instructions. If they do not provide clear permission, leave it out: convenient upholstery protection must not change the approved geometry or stability of the installation.
Will a seat-back organiser work with a seat-mounted side airbag?
There is no universal answer. Locate the marked airbag areas in the vehicle manual and compare them with the organiser’s attachment diagram. Fabric, straps and filled pockets must not cover those zones, adjustment controls or wiring.
How should I choose a charger for two rear devices?
Compare the permitted load of the vehicle socket and adapter with both devices, then check each port and cable. Choose a layout in which plugs are not under tension, the adapter does not wobble and no cable crosses a belt or walkway.
Can a tablet be mounted on the head restraint in front of the child place?
Only when the holder supports that head restraint and the tablet’s mass, locks firmly and does not change the head-rest, child-restraint or belt position. Check both relevant manuals and verify before every trip that the device does not move in its mount.
What is sensible to keep permanently in a cabin organiser?
Keep a small, stable set of light items: tissues, a soft pencil case, bags and similar daily essentials. Heavy, sharp, glass or rarely used objects are better placed in a closed, secured boot compartment.