In brief: clean the cabin after summer in this order: dry removal, local stain treatment, material-specific care, then complete drying. Vacuum sand and dust first, then choose separate products for plastic, fabric and leather. Unless the instructions say otherwise, use a small amount on an applicator or microfibre cloth and remove residue with a second clean cloth. This reduces the risk of rings, over-wetting and a sticky or greasy finish.
After intensive summer travel across Ukraine, a car may hold road dust, sand, sunscreen transferred from hands, coffee drips and sweet drinks. These soils behave differently: dust can scratch when rubbed, oily sunscreen spreads, while a drink can reach the seat padding. Buy an “all-purpose” bottle only when the product page and instructions explicitly list your surfaces. The interior cleaners for different materials category is a useful starting point, but the purpose of each product still needs to be checked before ordering.
Start with the surface, not the bottle
Inspect the interior in daylight and separate the job into zones: matt and gloss plastic, screens, fabric, headlining, real leather, synthetic leather, seat belts and parts near side airbags. Check the seat material in the vehicle specification, owner's manual or markings. Appearance alone does not always distinguish coated leather from vinyl or synthetic leather.
Before any wet work, remove the mats, empty door pockets and vacuum seams, gaps and seats. Do not rub loose sand with a damp wipe. Fabric may take a brush approved for upholstery; leather and delicate plastic need particularly soft bristles. Assign different cloths to dirty areas, plastic, fabric and leather so that residue and dye are not transferred from one zone to another.
Selection table by material and soil
| Surface and mark | What to choose | How to work | What to check before ordering |
|---|---|---|---|
| Matt plastic, dust and fingerprints | Interior plastic cleaner; matt dressing only if required | Dry microfibre first, then a small amount of product on the cloth and a final dry wipe | Approved plastics, matt or gloss finish, exclusions for screens and steering wheels |
| Plastic or vinyl with sunscreen | A product that explicitly allows use on that surface | Do not spread it; treat a small area from the edge towards the centre and remove residue | Hidden-area test, dwell time and whether rinsing is required |
| Fabric seat with a fresh drink spill | Textile cleaner, white microfibre and a soft brush if needed | Blot first, work in small doses and dry fully | Colour fastness, application method, headlining suitability and drying time |
| Fabric with dry dust and sand | Vacuum and a suitable upholstery brush | Lift the pile without heavy pressure and collect particles before adding moisture | Bristle stiffness, fabric condition and vacuum attachment |
| Real leather with an oily mark | Dedicated leather cleaner and separate care if required by the instructions | Remove loose dirt, work gently, avoid flooding perforations and allow to dry | Leather type, perforation, colour and compatibility with the protective coating |
| Synthetic leather or vinyl | A formula explicitly approved for synthetic leather or vinyl | Wipe lightly without aggressive rubbing, then remove residue | Do not substitute a real-leather product; check the car maker's restrictions |
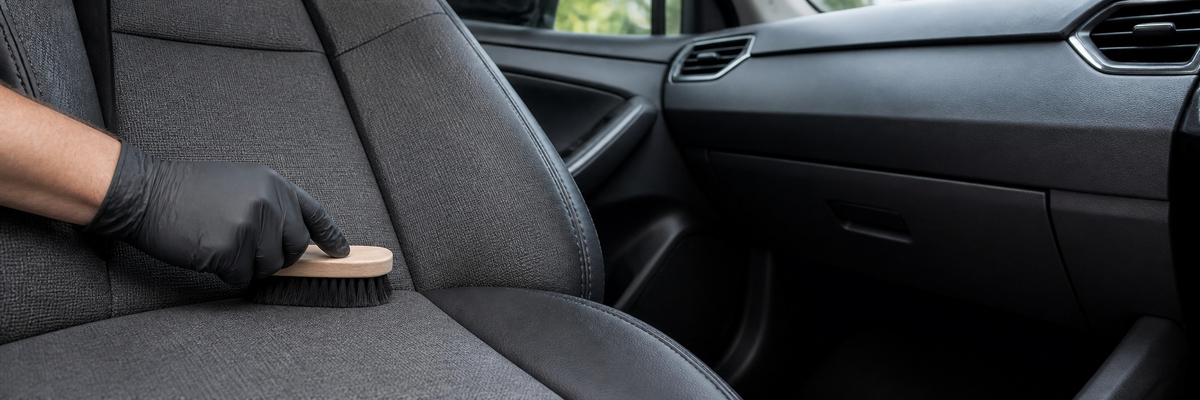
Fabric, leather and plastic call for different bristles, different moisture levels and separate clean microfibre cloths.
Plastic: cleaning first, finish second
A cleaner removes dust, fingerprints and compatible soil; a protective dressing changes the finish and feel. Do not cover dirt with another layer of polish. Clean and dry the part first, then decide whether it needs extra care. For a calm factory-style appearance, look for a matt or satin result on the label instead of judging the product by bright packaging.
If a liquid format is convenient, compare dashboard-care sprays by intended surface, finish, scent and application method. Do not spray towards displays, instruments, switches, vents or airbag zones. Applying the product to a cloth is safer when its instructions allow that method.
Dashboard-care lotions can be easier to dose onto an applicator, but a thicker formula does not guarantee a non-sticky result. Apply a thin layer, observe the stated time and remove all excess. Do not leave any treatment that may alter grip on the steering wheel, selector, pedals or other hand- and foot-contact surfaces. Use only specifically approved products on screens and gloss trim.
Fabric: less water, more control
Blot a fresh drink first with a clean, light-coloured microfibre cloth or absorbent wipe. Do not spread the mark or begin with a stiff brush. After lifting free liquid, test the cleaner in a hidden area. Check whether colour transfers to a white cloth and whether the shade changes once the test has dried.
Work in small sections and follow the directions for dilution, dwell time and residue removal. Over-wetting a seat can carry liquid into the padding; over-wetting the headlining can affect its adhesive. Use a spray-extraction cleaner only where the material and construction allow extraction. Ventilate afterwards and do not close the car until the upholstery is fully dry.
Real leather, synthetic leather and perforations
Remove dust first with a safe vacuum attachment or a soft dry cloth. Put a small amount of the approved product on microfibre or a soft brush rather than into perforation holes. Work without heavy pressure and lift soil in stages. Do not use a steam cleaner, strong solvent or household bleach.
A cleaner for real leather is not automatically suitable for synthetic leather, vinyl or a suede-like material. A conditioner is not required by every man-made surface either. Before buying, confirm the exact material, the vehicle maker's guidance, the permitted application area and whether a separate protective step follows cleaning. Never spray directly onto a seat side containing a side airbag.
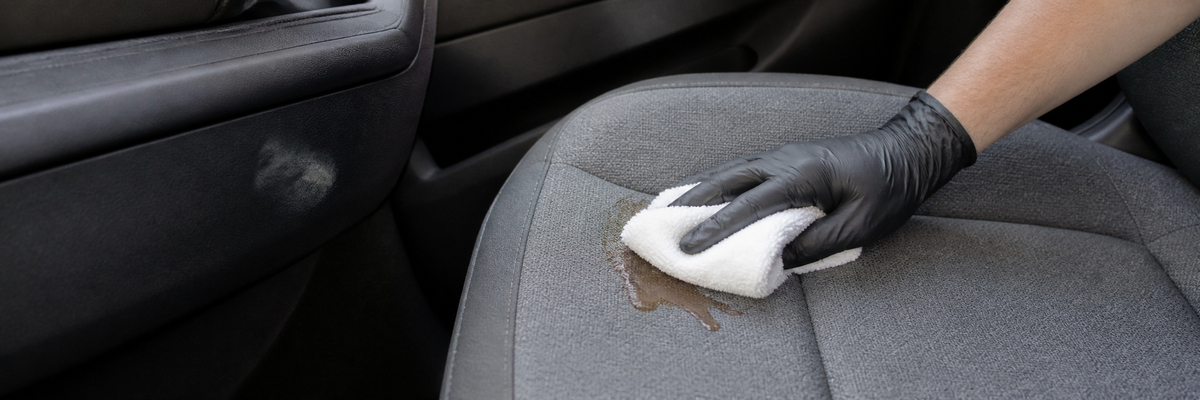
Contain fresh liquid first, then clean in small doses and never add a new chemical over an unidentified residue.
Removing sunscreen and drink marks without rings
- Stop the spread: blot a drink and lift thick sunscreen residue carefully with a clean cloth instead of smearing it.
- Identify the material: plastic, fabric, leather and vinyl do not receive the same formula by default.
- Read the instructions: find the approved surface, concentration, dwell time and removal method.
- Run a test: judge colour and feel only after the test area has dried completely.
- Work from edge to centre: this helps avoid expanding the boundary. Never scrub with an abrasive.
- Remove residue: use a separate clean microfibre and leave no wet or tacky layer.
- Dry the area: ventilate the cabin; if a mark, odour or colour change remains, do not switch blindly to a stronger chemical.
What to prepare for one clean-up
A practical kit includes a vacuum with a crevice tool, a soft brush for delicate areas, a suitable fabric brush, gloves and several clean microfibre cloths. Colour coding helps: one for dirty plastic, one for the final dry wipe, one for fabric and one for leather. A disposable wet wipe is suitable only when its packaging confirms compatibility with the material; a household wipe containing unknown alcohol or bleach can damage a finish.
Before buying chemicals, write down three facts: the material, the type of soil and the finish you want. If the product page does not answer whether it is suitable for leather, displays, perforation or matt plastic, do not treat silence as approval. Ask before ordering or choose a better documented option.
Compatibility checks before ordering
- Material: real leather, synthetic leather, vinyl, fabric, suede-like upholstery, matt or gloss plastic.
- Zone: seat, headlining, dashboard, display, steering wheel, belt, door card or area near an airbag.
- Purpose: cleaner, stain remover and finishing dressing are different jobs, not interchangeable labels.
- Format: aerosol, trigger spray, foam, liquid, lotion or ready-made wipe; check whether it may be applied to an applicator.
- Finish: matt, satin or gloss; low reflection is normally more practical on the panel in front of the driver.
- Process: dilution, dwell time, rinsing, a second dry wipe and total drying time.
- Restrictions: perforation, dyed leather, displays, electrical switches, steering wheel and side airbags.
- Kit contents: volume, sprayer, brush, applicator and cloth count should suit the size of the job.
Mistakes that leave stains and sticky shine
- Rubbing dust immediately with a damp wipe and turning sand into an abrasive.
- Spraying too much product directly onto the dashboard, switches, display or perforated seat.
- Choosing a polish instead of a cleaner and sealing dirt beneath a new layer.
- Using one microfibre cloth for plastic, fabric and leather.
- Scrubbing a drink stain hard and enlarging its edge.
- Over-wetting a seat or headlining, then closing the cabin before it is dry.
- Applying real-leather care to synthetic leather without checking.
- Judging the result while it is wet and layering another product over the first.
Post-summer interior cleaning checklist
- Photograph stains and note the material in every problem area.
- Check the vehicle manual and the product label.
- Remove rubbish and mats, then vacuum thoroughly.
- Prepare separate clean cloths and suitable brushes.
- Begin with a hidden-area test and wait for it to dry.
- Treat fresh marks locally without flooding padding or electronics.
- Remove cleaning residue before applying compatible care.
- Ventilate and return the mats only when everything is fully dry.
- Stop and consult a specialist if odour, colour change or an unknown material remains a concern.
Frequently asked questions
Can one cleaner be used on plastic, fabric and leather?
Only if the manufacturer explicitly lists all three materials and the vehicle manual does not prohibit it. Even then, test each surface separately. Displays, steering wheels, perforations and side-airbag areas need additional checks.
How should sunscreen be removed from plastic or a seat?
Lift the excess without spreading it. Use a product approved for the exact material, place a small amount on microfibre and work from the edge towards the centre. Remove residue after the test and dry the area.
Why is the plastic sticky after using a dashboard polish?
Common causes include too much product, an unsuitable finish, application over dirt or residue that was not removed. Do not add another layer. Follow the label, lift the excess by the approved method and finish with a clean dry microfibre cloth.
How can I tell whether a brush is safe for the upholstery?
Check its stated use, softness and the condition of the bristle tips. Try it on a hidden area without heavy pressure. Leather needs soft bristles; with thin or damaged fabric, begin with a vacuum and microfibre instead.
Can the seat be used immediately after wet cleaning?
Wait until it is fully dry. Pressure on damp fabric can redistribute soil and leave a ring, while a closed damp cabin can retain odour. Dry with ventilation and avoid overheating the surface.
What should I do with an old stain if the material is unknown?
Do not use a stronger solvent or mix products. Identify the material from the vehicle specification or manual, record what has already been applied and consult a professional, especially for headlining, perforation, pale leather or an airbag area.