Short answer: a tape-on deflector attaches to the outside of the door frame and stays out of the glass channel; an in-channel deflector sits inside the weatherstrip channel and demands a particularly accurate fit. Neither design is universally better. First confirm which version is specified for your vehicle’s make, model, year, generation and body style. On a car with one-touch closing or anti-pinch reversal, use an in-channel kit only when compatibility is documented and the glass moves freely after installation.
What window deflectors do in rainy weather
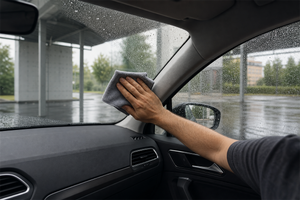
A visor covers the upper edge of the side-window opening, allowing the glass to be cracked slightly for ventilation during ordinary rain. This can help moist cabin air escape when the windows begin to mist, but it does not replace a working ventilation or air-conditioning system and a clear driving view. A deflector does not make an open window watertight: crosswinds, a strong water jet or a car wash can still send drops into the cabin.
Start with the main vehicle-matched window deflector category, then narrow the choice to the exact vehicle. Do not leave a parked car’s window open merely because the gap is hidden by a visor. It is not protection against theft, a downpour or water changing direction with the wind.
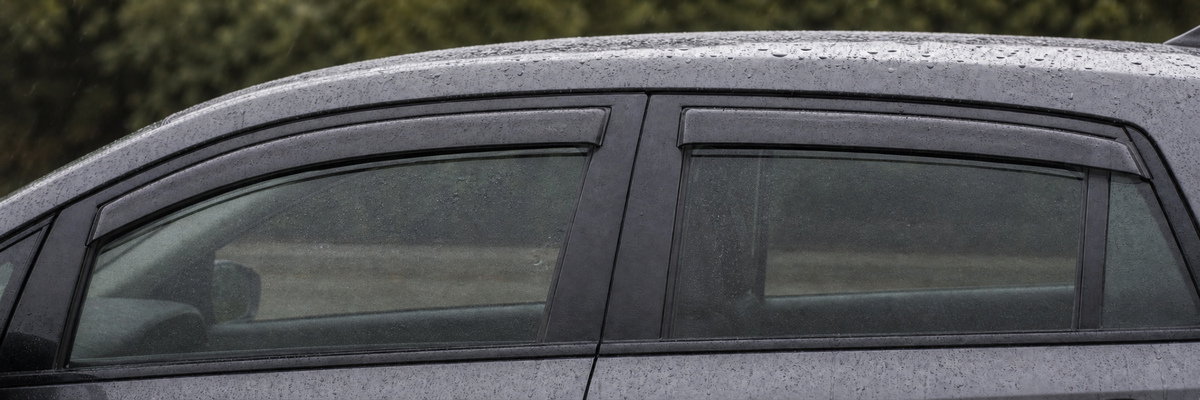
The useful setup is a small ventilation gap beneath a correctly fitted visor, not a widely open window.
Why vehicle-specific fit matters in Ukraine
According to the Institute of Car Market Research, using open registration data from the Main Service Centre of Ukraine’s Ministry of Internal Affairs, 74,725 used-car transactions took place on Ukraine’s domestic market in June 2026. Volkswagen led the makes, Renault ranked second and Skoda fourth; familiar models included the Passat, Octavia, Lanos, Focus, Megane and Camry. The important limitation is that market statistics consolidate variants under a base model, while that model may have several generations, body styles and door frames. Popularity therefore does not prove accessory compatibility. The market snapshot source is retained in the editorial notes.
Even within the Volkswagen window deflector range, for example, a Passat saloon must be distinguished from a Variant and from the B5, B6, B7 or B8 generation. In the Skoda window deflector range, the name Octavia is likewise incomplete without the generation code, year range and body style: a liftback and an estate may require different parts.
Tape-on or in-channel: a meaningful comparison
| Criterion | Tape-on, outside the frame | In-channel |
|---|---|---|
| Mounting position | Outside, along the upper door frame, usually on pre-applied adhesive tape; some kits also specify retainers | Inside the weatherstrip channel; clips or small adhesive sections may be used depending on the kit |
| Main advantage | Does not occupy the path of the glass, and alignment is easy to inspect during a dry fit | The fixing is hidden within the opening, leaving a visually restrained outer door line |
| Main risk | Poor adhesion on a wet, dusty, cold, waxed or silicone-contaminated surface; a fully pressed part is difficult to realign | The wrong shape or position can press on the glass, fold the weatherstrip or trigger window stop/reversal |
| When to choose it | When the listing confirms the exact vehicle and exterior mounting method, and the frame can be prepared correctly | Only when the manufacturer confirms the exact body and channel, and its instructions address window movement and safety functions |
| Post-installation check | Even contact, secure edges and no lifting tape; follow the stated operating and washing restrictions | Slow, unobstructed closing of every window, correctly seated weatherstrips and no persistent safety reversal |
Practical rule: the fitting method stated for the exact kit takes priority over the broad category name. Do not turn a tape-on kit into an in-channel one or add your own tape or clips unless the instructions explicitly require them.
How to match a deflector to the body, not a similar photograph
Begin with the registration document and confirm the generation from a VIN-based catalogue, the vehicle handbook or the seller. Then compare the door shape with photographs of the exact part number. A reliable order needs more than the make and model:
- Year range and generation: the calendar year may sit on the boundary of a facelift or a generation change.
- Body style: saloon, hatchback, liftback, estate, coupe, SUV and van can have different door lengths and roof lines.
- Door count: three- and five-door versions of the same model require different kits.
- Framed or frameless doors: frameless glass needs a kit expressly approved for it; an ordinary in-channel visor is not suitable by default.
- Number of pieces: a kit may contain two front pieces or four front and rear pieces. The listing and the delivered set must agree.
- Sides and mounting line: left/right and front/rear pieces must follow their respective frames without tension, trimming or distortion.
- Door details: check the mirror sail, pillar, decorative trim and weatherstrip where any of them meet the part.
Surface preparation and installation without one-size-fits-all recipes
For a tape-on kit, assign every piece to its door and perform a dry fit before removing the backing. The edge should run parallel to the frame, avoid the neighbouring door and leave it free to open. Remove dust, wax, polish and silicone from the mounting zone, then dry it fully. Use only a product permitted by the deflector and tape instructions and compatible with the frame material. Take the application temperature, pressing method, operating restrictions and time before washing from the instructions for that exact kit.
For an in-channel kit, clean and dry the channel, identify every side marking and install the pieces in the stated order without excessive bending. Raise the glass slowly in small increments. If it binds, needs obvious force, folds the rubber or drops automatically, stop: lower it, inspect the fit and follow both the kit and vehicle instructions. There is no universal “window reset”; use only the procedure specified for your exact vehicle.
A glass cleaner is useful for maintaining side windows and removing road film, but it is not automatically the right final preparation for an adhesive zone; some formulas leave additives behind. In the mixed lubricants and anti-silicone category, select only a compatible anti-silicone/degreaser when the instructions allow it. Never apply silicone lubricant to the bonding area: it reduces the adhesive tape’s grip.
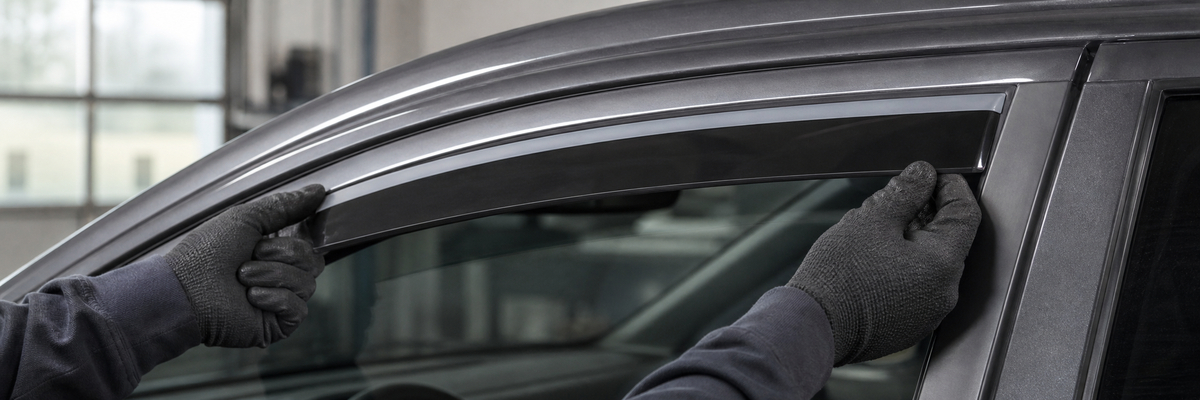
A dry fit before removing the backing verifies length, curve, side and clearances without making the position permanent.
Compatibility: what to check before ordering
- The complete make, model, generation, year range, facelift status and body style.
- Three or five doors, framed or frameless glass, and left- or right-hand drive if the manufacturer lists it as a distinction.
- The part number and photographs of the chosen kit, not a neighbouring listing.
- Tape-on or in-channel fitting; included clips, adhesive tape, wipes and instructions.
- Two or four pieces, with front/rear and left/right markings.
- Compatibility with one-touch closing and anti-pinch protection for an in-channel design.
- Limits for installation temperature, surface preparation, closed-window conditioning and time before washing.
- The return conditions before fitting: do not peel the tape backing until shape and contents are confirmed.
Checks after installation
- Inspect every door in good light. The profile should be straight, with no waves, cracks or raised edges.
- Open and close the doors, ensuring neighbouring pieces and weatherstrips do not touch.
- With the vehicle stationary, slowly test the full travel of every window. Do not keep holding the switch if the glass meets resistance.
- Make sure no weatherstrip has folded inward and the glass closes completely without skewing.
- Observe the manufacturer’s conditioning period. Do not test adhesion with a pressure washer.
- After the first drive and first rain, inspect the edges again and listen for a new whistle that could indicate misalignment.
Mistakes that cause poor fit or lost adhesion
- Ordering “for an Octavia”, “for a Passat” or “for a Duster” without generation, years and body style.
- Treating a saloon, liftback and estate as identical because the base model name matches.
- Bonding without a dry fit, or trimming a vehicle-specific part that does not match.
- Wiping the mounting area with a product that leaves wax, silicone or a protective coating.
- Installing on a wet, dusty, overheated or excessively cold frame against the instructions.
- Visiting a car wash immediately or lifting the edge with a finger before the stated conditioning period ends.
- Forcing a window against an in-channel visor or ignoring repeated safety reversal.
- Reusing spent adhesive tape and expecting the same bond as a new specified system.
Buyer checklist
- Record the make, model, year, generation, facelift, body style and number of doors.
- Photograph the vehicle square-on from the side and take close-ups of the upper front and rear door frames.
- Select only the fitting method stated for the exact part number.
- Verify shape, piece count, sides, fixings and the supplied instructions.
- Before peeling any film, hold every part against its own door and check the gaps.
- Prepare a clean lint-free cloth and only the permitted surface-preparation product.
- Allow enough time for fitting and for the specified conditioning period, protected from water.
- After fitting, test the windows slowly and inspect the kit again after the first drive.
Practical FAQ
Which is better in rain: tape-on or in-channel deflectors?
Both can shelter a small window gap from direct drops. The better option is the kit accurately made for your body style and installed as specified. Tape-on parts stay out of the glass channel but depend on surface preparation; in-channel parts hide the fixing but must work freely with the glass and weatherstrip.
Can I choose window visors from the make, model and year alone?
Not always. Add the generation, facelift, body style, number of doors and the part’s stated year range. Two versions may have been sold in a transition year, while saloon, liftback and estate variants often use different kits.
What if the glass catches the in-channel deflector or drops again?
Do not keep closing it with force. Lower the glass, inspect the part and weatherstrip, then follow the deflector and vehicle instructions. If the compatibility or cause of resistance is unclear, remove the kit and contact the seller or a competent installer.
Can ordinary glass cleaner degrease the frame before bonding?
Only when the instructions for the selected tape or deflector expressly allow it. Some cleaners leave antistatic, scented or protective additives. Prepare the adhesive zone with a compatible product and a clean lint-free cloth; silicone lubricant is unsuitable.
How soon after installation can I drive in rain or use a car wash?
There is no single waiting period. It depends on the adhesive system, temperature and design, and official instructions from different manufacturers specify different times. Follow the period supplied with the kit and do not substitute a pressure-washer test.
Can tape-on deflectors be moved to another car?
Only if the manufacturer confirms the same part number and geometry and the fixing can be renewed exactly as instructed. A distorted used part or spent tape gives unpredictable fit and adhesion; treat a bonded kit as vehicle-specific and its tape installation as single-use.